Sunday

Sunday in Pictures


I've been slackin' on my bloggin' because..........
I've been canning up a storm!
Thur. I had to go to Door County with Butsch to help support the
Lions Club Antique Show in Fish Creek.  (100 % of the proceeds after
expenses went to Leader Dogs For The Blind.)  Just so happens the
cherries were ripe.  Door County's nickname is Cherryland.
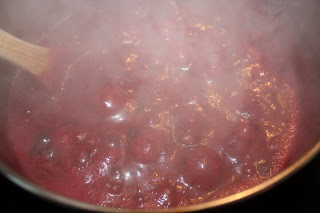
I canned cherries and.,....


Guess what else I made.
Yes...it's made with (tart) cherries.

Cherry Bounce!
Here's the recipe (at the end of the post).


Second year in a row at a very sad attempt to make
a garlic braid.  One of these days I just have to take the
 time to google how to do it!  I had to dig the garlic because
if they dried up all the way, I'd never find them in all the weeds!


Look how well my cauliflower is growing!!

(I honestly have no recollection of planting kohlrabi -- but I must have :-)
I thought it was cauliflower until just the other day LOL!)


My Mammoth Sunflowers took a beating in the
60 mile/hr. straight line winds that we had with
a thunderstorm yesterday.  The corn stayed up though!
Sure wish I could pack some rain up and send it out west
to all of you struggling with your gardens!


                                                      .....praying for rain out west.

.....dr momi

Farmchicks Farm Photo Friday


Saturday

Canning Blueberry Spice Jam

     We made this Blueberry Spice Jam at our Master Food Preserver class. I've made blueberry freezer jam before and didn't care for it, but this Blueberry Spice Jam is right up there with strawberry for me!  The recipe is in the "Making Jams, Jellies, & Fruit Preserves" booklet put out by the Wisconsin-Extension Cooperative Extension.  You can buy it here.  Or call them at 1-877-947-7827.


Crush 5 cups of blueberries one layer at a time.


Add 1 TBL. of lemon juice, 1/2 tsp. of cinnamon,  3/4 cup of water
 1 box of powdered pectin, and 1/4 tsp. butter. (to reduce foaming) 
Now cook it on high heat while you are stirring, to a rolling boil.


Make sure your jars are sterilized and staying hot.
....and your lids are warm (not boiling) in a shallow pan.


...and have 5 1/2 cups of sugar measured and ready to go.


As soon as it gets to a rolling boil, add your sugar all at once.
Now bring it back up to a rolling boil.  (keep stirring)
When it is really going -- time it for 1 minute.
Then take off heat.


This is a rolling boil.


     After you take it off the burner, skim the foam off, or, use this cool tip I learned.  Lay a piece of waxed paper all over the top and when you lift it, all the foam comes with it.  Cool!  Fast and less waste.  Now fill your jars to 1/4 in. from the top.  Wipe the rims, put on the caps, and the rings.  Tighten the rings just to "fingertip" tight.   The two piece cap needs to "breathe" a little -- that's what gets rid of oxygen.  Use a towel in your hand -- the jars are really hot!

     Put the jars in a water bath canner.  Make sure there is 1 to 2 inches of water above the jars.  When it comes to a rolling boil, time it for 5 minutes.  When time is up, turn off the burner, and lift the lid so the steam goes away from your face.  Let the jars sit for 5 minutes.  Then using a jar lifter take them out and let them sit on the counter.


Use a jar lifter.  Anything else is just dangerous.


Jar lifters have many uses.  They can also
be monster truck lifters.  :-)


Now sit back and listen to the jars "ping" as they can.  We always count :-)  This is great jam.  Enjoy!


The jar with the scrap of paper on it will be my fair entry.   ...a perfect 1/4
inch headspace.  All the decorative jars will be Christmas gifts!


.....dr momi

Tuesday

Need a Funny Caption

......because we all need to laugh a little.


Did someone say "shot gun wedding"?

Last weeks caption coined by Dicky Bird
over at Dicky Bird's Nest

(You have got to read all the captions in the comments
from last week.  They will have you rolling!)


What's your caption for this week?


Sunday

Sunday in Pictures


Butsch and I and the rest of our "puppy raising group" took off Friday
for Leader Dogs For The Blind in Rochester Michigan to attend Leader Dog University.
We were able to listen to speakers, get training tips, and the Leader Dog people
were able to see the puppies they bred, --- about half grown up.
You should see the look on people's face when a bus pulls up to the
wayside and 15 of the cutest puppies ever hop out :-)


Duke was with us.  He is being raised in a work release correctional prison
by an inmate.  The inmate of course cannot cross over state lines, so,
someone in our group brought Duke along for the experience.
He has the biggest, blockiest, head of any lab I ever saw. :-)


Maisie was with us. (Golden Retriever)
(I think she looks like a lttle fox in this picture :-)


Jo was with us.  (Black Lab)


Micah was with us.   (Yellow Lab)
He is sporting a UW Badgers scarf -- we could
dress for the theme of the day.


.....and Scout was with us. (Yellow Lab)
He was one of the younger pups on the bus.


And last but not least, we had a working dog on the
bus with us.  Lilly is leading a visually impaired
person.  When I called Lilly's name to take her picture,
she turned her head away from me and ignored me.
Good Girl Lilly!
The last thing a blind person needs is a dog that
is distracted by someone on the street.


We had a lot more puppies on board, but it was very hard to take pictures while I was handling Butsch. :-)  (Butschy Boy was a tad overexcited most of the trip.)  He was the only German Shepherd on the bus.  I saw one of his siblings at Leader Dog.  She was 3 inches shorter than him and much smaller.


Guess who I saw in harness there?!
Trixy!
This is a picture of Trixy the first day we got her.

(For those who don't know, Trixy was the last puppy I raised
and she has been at Leader Dog getting her formal training in harness.)
We rarely get to see the dog we raised in it's formal training.
I got to say hello to her.  Did she wiggle!  Her trainer said she is "teacher's pet".
If all goes well, she will be eligible for issue to a blind person in August.
.....dr momi

Wednesday

Need A Funny Caption

.....because we all need to laugh a little.


                                                       ......from 2 weeks ago


You lookin' at me?

Last weeks caption coined by Sharon over at:
Fitzgerald's Family Farm


.....what's your caption for this week?


.....dr momi

Tuesday

Crafting With Tansy

     It grew in the ditch 1/4 mile away, but that wasn't good enough for me.  How much easier it would be if I had it growing right here in my garden.    .......don't do what I did.  I planted a packet of seed. Where I got it from I can't remember, but, a little warning on the packet would have been nice.  If you let one tansy flower go to seed you will be sorry.  It is a perennial -- and they will be everywhere -- to the point of taking over a field. (unless of course you use sprays)

     The reason I like tansy is it makes such a beautiful dried flower.  I particularly like to make wreaths in the fall, and the homey yellow of the tansy really is a nice touch.

     As an herb, tansy can make you quite sick (fatal in large doses).  In years gone by it was used to worm animals, (and people) and to help keep flies away.  I wouldn't experiment on my animals or myself, and I've tried the fly keeping away thing....not really helpful by my standards.  So, in my opinion, don't give it to your animals or try drinking it yourself.

Tansy is just starting to flower here


Tansy usually grows in "patches" in the ditches.
It's not in the farmers field only because they spray.


The leaves need to get stripped. 
Use your thumb and forefinger to strip the leaves all the way down the stem. 
 Tansy is very aromatic, and I am sure some of those volatile oils are absorbed through your skin. 
No big deal except if I was pregnant I would not do it. 
 If you are pregnant, leave the leaf stripping to someone else.


Tansy has to be hung upside down until it
is dry.  When it is dry it will hold it's shape.
I keep it on long stems in case I want to use it
in a flower arrangement instead of a wreath.
     Later this fall I'll make grapevine wreaths and show you what it looks like all "done up" with dried flowers.

.....dr momi

Sunday

Sunday in Pictures


I spent 3 days becoming a "Master Food Preserver" last week.
(I thought it was only a "Master Canner"....turns out I'm MORE than that... lol!)
It was 3 days of intense dehydrating & canning, along with class,
 "homework", and a "final".  .... I passed :-)
 I will write a post on all the neat tips I learned .


Twenty-one of us canned all this the last 2 days.


.....and dehydrated all of this the 1st day.
(Yup that's jerky on the end.)
The grandbabies gobbled up all the fruit leather and dried pineapple I brought home.


This was one hot (literally) tree frog this afternoon.
I'm pretty sure he is not the one that hopped a ride on me
last night as I walked in the door!   *scream*
It is "tree frog city" around here lately!


The kidde pool was filled this evening and
the water fights began.


Things got a little more intense when Uncle Matt got in the picture.


Pretty intense.....


We interrupt this water fight for Dairy Queen ice cream cake!
It was Uncle Danny's birthday.


                                         Hope everyone is staying c-o-o-l .

.....dr momi

Saturday

Bottling The Elderberry Wine


     The elderberry wine has been fermenting since last Oct.  It's now nice and clear, and ready to be bottled.  One gallon of wine equals 5 bottles of wine.  This year I made 3 gallons of elderberry wine so I have 15 bottles ready to go.

     Bottling the wine can be messy, but not really hard.  Having the right equipment is a must.  (I'm still missing a clip to stop the flow of wine when I want.)  A siphon is needed for sure, and a bottle corker.


The bottle corker and the corks (size 8 x 1 3/4).
This corker works slick...about $30 at the wine supply store.
 .


The siphon and corker get washed in One Step.
I will put the siphon together and siphon some One Step water through it
to make sure the tubing is all sanitized.  I will do it again
after we are done, before I store the siphon.


    The carboy (jar) of wine is on the table, and we are filling bottles that are sitting in the chair.  The carboy has to be higher than the bottles.  When I first started wine making, I had it the other way around and couldn't figure out why the wine wasn't coming out --LOL!  So....if you should make that mistake, just remember that dr momi has been there, done that first :-)


I waited until I had help.  It's really a two person
job.  Turns out this ended up being a 4 person
job :-).  One daughter held the siphon, one daughter filled the bottles,
my husband took the filled bottle and exchanged for an empty bottle.
....and I took pictures :-).
Here the siphon is in place, pumped, and the wine is flowing.


As the bottle fills up, Katie will raise it so
the flow stops.  Bottles are exchanged and then
she will lower it again to fill.
She only overflowed a bottle once :-)


The little boys were helping.
....who would have thought wine bottling could be family entertainment :-)


The bottle corker is easy to load with the cork. (Soak the corks in One Step
for a couple of minutes before loading.)  Pushing down with even
 pressure on both sides, Kristy corks a bottle.  You have to use a
little muscle, but, if I can do it -- anyone can.


The bottle on the left...the cork is too high.
The bottle on the right...the cork is too low.
Neither of these bottles will be fair entries :-)


Elderberry wine is just plain pretty.


15 bottles of elderberry wine that will get stored in the cool basement.
One will be a fair entry, some will be gifts, the rest to be enjoyed over winter.
(Especially when there are colds going around.)
....we sipped it -- my best effort ever :-)


.....dr momi